Well, now let me tell ya, if you’re wantin’ to find the SID of a user on your computer, there’s a few ways you can go about it, and none of ’em are too hard, though you might need to follow a few steps carefully. Don’t worry, I’ll walk you through it like I would if I was sittin’ on the porch with a cup of tea in hand!
First thing you need to do, is press the Win key on your keyboard and the R key at the same time. This’ll open up a little box, you know, where you can type things. Once that box pops up, you type cmd and hit OK. That’s gonna open a thing called the Command Prompt, which is a fancy way of sayin’ you can type in commands and the computer will do what you tell it to.
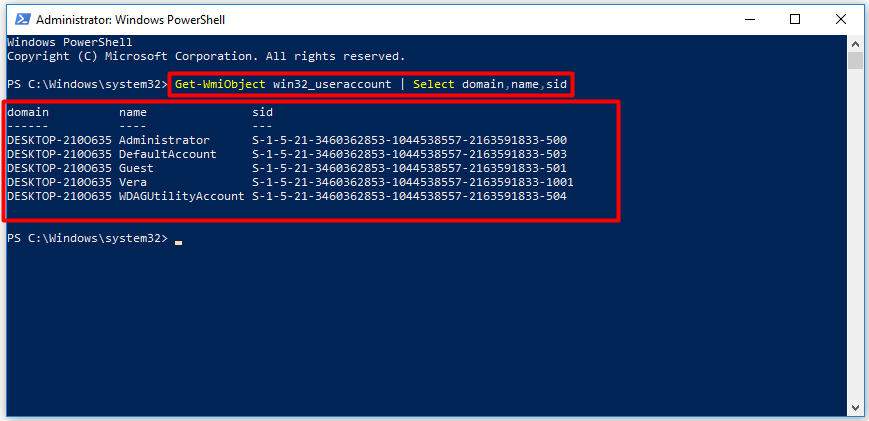

Now, once you got that window open, you type in this command right here:
whoami /user
After you hit Enter, the computer’s gonna show you a bunch of info, but what you’re lookin’ for is the SID, which stands for Security Identifier. It’ll be listed right there in front of you, just like your name in the family Bible!
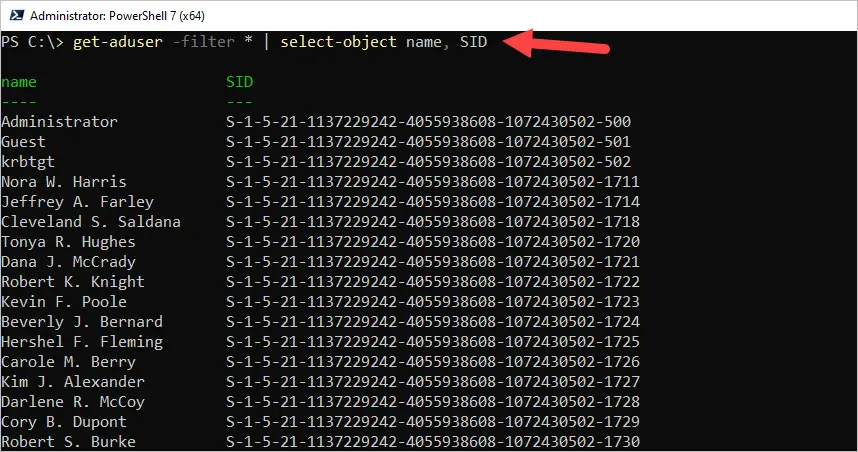
But if you’re more into PowerShell, well, don’t you worry ‘bout a thing. PowerShell’s just another tool you can use to get the same info, just a little fancier-like. You’ll need to open PowerShell first, of course. You can do that by searchin’ for it in the Start menu and clickin’ on the app that shows up. Then, once you’re in there, you can run the Get-LocalUser cmdlet. It’s a little fancy too, but all it does is give you details about the local users on the computer.
Here’s the command you’ll want to use to get the SID of your user account:
Get-LocalUser | Select-Object Name, SID
This command will give you the name of the user and the SID right along with it, just like a name tag at a family reunion. It’s real handy, I tell ya.
If you’re tryin’ to do a reverse lookup, like, you got a SID and you wanna know which user it belongs to, well, you can do that too! It’s just a little bit more complicated, but don’t you worry, I’ll tell ya how. First, you open up PowerShell, just like we did before, and then you use this command:
Get-WmiObject -Class Win32_Account | Where-Object { $_.SID -eq 'YourSIDHere' }
Now, you’re gonna replace the ‘YourSIDHere’ part with the SID you wanna look up. When you run that command, PowerShell’s gonna tell you which user that SID belongs to, just like matchin’ a face to a name at the county fair.
So there you have it, folks! Whether you use the old Command Prompt or PowerShell, gettin’ a user’s SID isn’t too tough. Just follow these steps, and you’ll have it in no time, just like bakin’ a batch of cornbread!

Keywords: Show SID in PowerShell, get user SID, find SID, PowerShell commands, Microsoft Windows, get user details, SID lookup
Tags:[Powershell, SID, Windows, PowerShell Commands, Get SID, Show SID, User SID, Microsoft Windows]
